| Day 315 |
 |
Head door frame/shelf++ |
| Day 315 |
|
Head door frame/shelf++ |
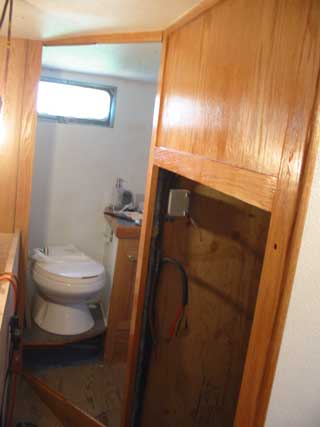
| As mentioned previously, the doorway into the head has been a problem with respect to clearance and open position. | |
| Bi-fold doors wouldn't work because they
come out at 90º, plus they rattle. Sliding doors wouldn't leave enough
room to get by. Curtains are too, well, you know! A full size door
wouldn't be able to swing in because of the head, and swinging out would
be a tight squeeze to get by as the cockpit cupboard is right there. If
the door wasn't at such an angle, several possibilities would be
available. Unfortunately, the original door position was moved because
the berth needs to tip up to access under it and with a door frame there
it wouldn't be able to. lol The solution was to have 2 doors. One swings in and one out. This isn't without a slight problem as trying to control 2 doors in rough seas may be a difficult task. Fortunately we're both skinny and could fit thru just one door. Some interesting design considerations came into play as each door should have a stop position when closed so latching them is possible. |
 |
 |
Most of the time the doors will be pinned
open, but when they need to close, they need to latch together. The
photo to the left shows the bottom door frame. Notice the insets elegantly carved out be the router ( and me! ) into the inch thick frame. The doors will have a half inch notch as well so they can only reach an equal center. The latch can then be slid in. That will be similar to the cupboard latches except a longer throw, and handles on both sides, both doors. |
| While I did the door frame, Gena
insulated and foamed yet another section of the pilot house floor. The open
area forward has been left for now while we wait for the super quite
mufflers' pipe to arrive. This pipe, stainless, will run from the manifold
to the muffler, then from the muffler to the dry exhaust elbow.(
day 280 ) The engine hot air exhaust vent also comes through this. |
 |
 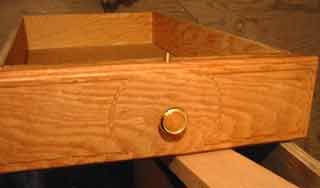  |
I also coated Genas desk with
stain and a coat of semi-gloss in preparation for temporary use of all the
tools, fittings, bits and screws etc. scattered all over the boat. The place needs to be cleaned up soon! The photo left shows a drawer with the latch and pin. After so many, I'm getting pretty good at it. One latch took me almost an hour at first. Now I can do one in 10 minutes from scratch. The lower photo shows a little shelf Gena put under her desk for small books or whatever. The drawer isn't in place so it is really just a small area. |
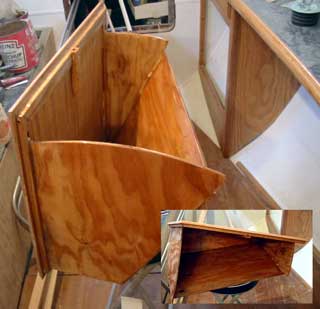 |
 "Stowage bin" good for unruly items |
| In the photo above one can see a flip out bin I made for my desk. It seems to be a good use of the limited space forward, although it was a bit tricky coming up with the shape. The rounded sides and the bottom are inset into the face frames for strength. | |
| The back was basically glued and
nailed into place with a slight twist, just like the hull! Looking to the right shows the water heater stand and the water heater still clad in it's protective plastic. The water heater must be higher than the diesel heater which will be one source for hot water. The small diesel tank for the gravity feed to the heater may be mounted above the tank, or on the hull side, we haven't decided yet. I wanted to mount it high up in the small closet next to the dry locker but that's another day to come ;) The hot water can also come from what's called a diversion load. This is where excess energy from the charging systems is diverted to keep the batteries from over charging. We must change the element from 120VAC to 12 VDC. The electric could be manually switched but it's a HUGE draw on the batteries. The heater is faster and better there. |
 Water heater mount ready |
 Yay! Somewhere to store those pesky crates of "stuff"! |
|
Day 315:
8 hours+6 hours - Framed entry to head, made shelves in pilothouse, made flip
out bin, insulated more floor
To DAY 314 |
Water Heating from various
sources Force 10  Engine, heater, electric, diversion load heating |
To DAY 316 |
|
|