| Day 316 |
 |
The diesel heater surround/
doors |
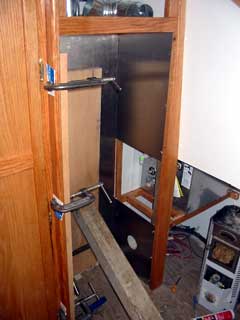
| I have been looking forward to making the bathroom doors for quite a while and I finally got my chance to start on them today. The doors will be comprised of framing and 2 separate panels to curb warping as it is a very large door. The dry locker door ( photo below, right ) was made with one panel as it has a firm seating against the locker face, but this door will have no support...or reason to stay straight. | ||
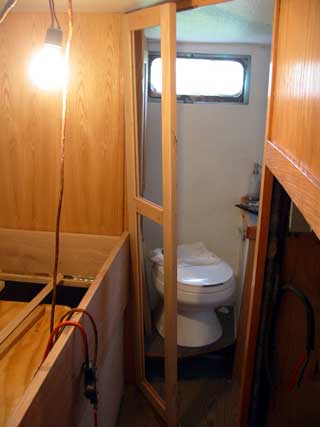
| The photo above
shows one door roughly in place. I know all the measurements are correct
but I just had to test it anyway, and take a picture! I am using the method I used on the vanity door except this time all of the slots will line up, and they are 5/8". Because the 1/4" ply was actually import and somewhat less than 1/4" good one side, another 1/8" good one side was glued on ( both sides will be visible ) which brought it to 5/8" exactly. This just happens to be the thickness of 2" oak trim so that will be used for connecting the frames. The frame in the photo is just held together with those, inset 3/8", and they're so tight the whole thing holds together. With glue it will be very strong indeed.
|
  |
||||
 |
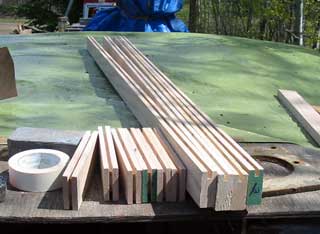
The photo to the left shows
the oak slotted for the bathroom doors. The inner edges have been
rounded, but only to where the butting frame meets. This way it is flat
still. It was tricky to do this because the router took my lines off lol!
|
| The doors are a slow process and I usually set some up to finish one evening during the week. If it's raining or whatever outside it doesn't matter because all of the cutting work is done. We're getting to the point where we don't want anymore saw dust in the boat than is necessary so most cutting/routing/power sanding is done outside. |
| Under the decks in the pilothouse offers a lot of stowage space. The little shelf doesn't go all the way aft so large items can be stored there and the water heater can be removed if necessary one day. The shelf has been faced to finish and prevent items from pressing against the sliding doors that will be installed. |  |
||
 S.S. clamped on with silicone and screws |
|||
 |
We acquired some thin stainless
plate is fairy good condition a while back so might as well make some use of
it. Aluminum would have worked the same way but I've seen what happens to
aluminum once the salt air gets at it, especially if it's not cleaned
regularly. It can't be polished without removing the anodized coating which
ends up making an ugly mess.
|
||
| The exact position of the flue will be determined be the position of the heater, and it's position will be determined by how the tiles ( yes tiles!! ) will be arranged on the floor. A job for tomorrow. | ||
Day 316:
10 hours - Put together 1 bathroom door, cut out heater surround, mounted water
heater, cut hot air vent, put in aft P.H. floor, Finished dry
locker door.
To DAY 315 |
Rent
marine advertising here... Email for more info! |
To DAY 317+ |
|
|
|
|