| Day 435 |
 |
Toilet back,
Rudder Indicator/ Dimmer, Venting Aft |
| Day 435 |
|
Toilet back,
Rudder Indicator/ Dimmer, Venting Aft |
| This isn't going to be toilet talk, but
really it is! And 2 days running to boot! It is an important area of the boat, and must be treated as such. In fact, only actually being on a sailboat for a few days makes one realize how important a good working toilet is. Of course there is the "bucket" or "natures way" but hey, lets be yachties! |
|
After some time "trying out"...well, pretending
to, as we can't turn on the water just yet, I suddenly noticed that there is
no support for the seatback because there is no tank! Funny this isn't even mentioned in the manual. Heeled over to starboard a few degrees, and a number 2 on the way, that back would snap off like a twig on the first lean. The solution is to put in a little, albeit useless really, shelf with a rubber bumper. This bumper was pulled out of someone's Kenworth truck. I knew it would come in handy for something! After a little routing with the Dremel routing setup, it looks kinda cool. Too bad it's too narrow to mount the garbage bin under it. |
 |
||
|
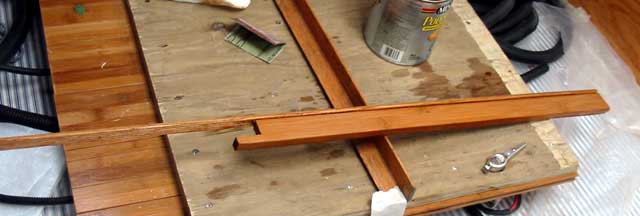
Because of this, some continuity need to be added
across the vanity.
I tried different things and found a length of bamboo flooring capped with some 1/2" quarter-round made a cool looking back. It would also support the triangle shelf. |
 |
||
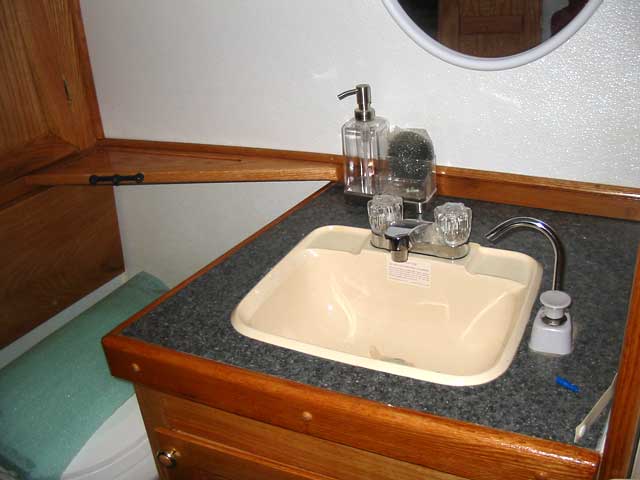
| There it is all in place. I sealed
the counter-to-wall behind it ( as one should always) with silicone, and
plan to run a bead along the edge once the next coat varathane is good and
dry. This wasn't the only thing I did today (and it was a long long day!) as sometimes there's just boundless energy flowing with us both at the same time so we work long and late. Gena ordered me ( he he) to " get that damn rudder indicator installed. |
 |
||
|
|||
|
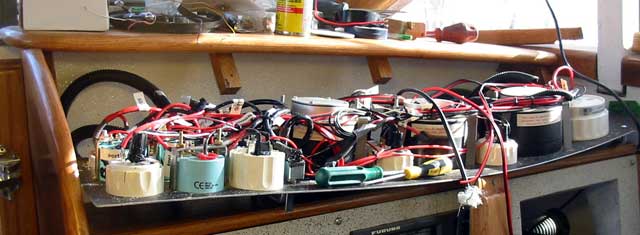
The solution is to make a follower-style amplifier
that leaves the voltage the same but increases the amperage. The problem to
that solution is that I haven't made that part yet. I guess Gena
forgot. So I quickly whipped up a board and made the thing to install inside
of the autopilot box. The the power was the next issue but I won't get into
that as Gena reads this too! ;) Anyway, as can be seen below, one thing led to another. The engine lighting had to be relayed over so it only comes on with the engine, and the wiring to the gauges changed thus. I had a lot of patience ( which is unusual for me! ) and got the job done. For more on the rudder dimmer circuitry, go to dashrudder.htm
The dimmer works nicely, and those (ug!) bulbs in the sealed wind indicator gauges work (after some fiddeling) well too! The whole unit can be shut down via a switch on the main panel under the dimmer switch.
|
|||
 |
Gena got "hole happy" today. She
started drilling holes everywhere and wouldn't stop! Holes in the aft
cabinets for venting, under lockers and through doors.... I was surprised when I saw she had used my "painted wood grain" vent grills. These were originally white but ugly yellowish white (like bad teeth!) so I got artistic one summer afternoon and pulled out the acrylic paints. She said they were the color of baby sh*** and she wasn't going to let them be in the boat. I guess they must've darkened with age or something because there they are! Don't they look real?! :D One or two of these have fans, notice the switch under the lower right inset, to force air through when needed. |
 |
The whole aft cabinetry is
basically piped and vented together. This will allow moisture a lot of
escape routes. This photo shows a hole that leads air through a pipe to the
smaller flip-up door cabinets. Wow! Gena finished her day away from the dash by cutting out some hol;es for my lights. I guess this would be a good time to mention that I don't have enough LEDs left and must make another order from hebeiLTD ... |
| DASH PC | |
 |
Finally, I began construction on
the Dash PC case. This is so we can look at electronic charts and track our
position in real time. Gena will probably use it to play cards or video
games, but hey what ever gets you through your watch! The case isn't to be 100% water proof, but will stop water from getting in the box from above, i.e. a hatch left open during a rain storm. The bottom will have a slot for passive ventilation
|
 |
Inserted in the track is a
fujitsu pen tablet PC. One of 4 we will have on board. They are expensive
new, about $3500, but can be found on the used market for $500 - $1000. (
1gig CPU +1gig ram ) and are tough, well built, and reliable. I have toted
one around for 4 years and it's never missed a beat. Can't say the same for
lap tops.
The "pen" can work through the Lexan, but for ease of use I plan to add a USB trackball to the arm rest. In the box, under the PC, will be mounted a video input card, a USB hub, and an RS-232 dongle for NMEA input. More on this soon! |
Day 435:
13 hours-mounted locker vents aft, cut out lighting holes, put in toilet lid
back support & trim, mounted rudder ind., started dash computer box
| Replace
this button with a link to your site, mailme ..to Main page |