| Day 434 |
 |
Head finishing,
more Dash |
| Day 434 |
|
Head finishing,
more Dash |
| With all the work I have been doing up
front, I almost forgot that the trim in the head hasn't been done yet! I
guess one just gets used to things the way they are, and that's finished
enough.
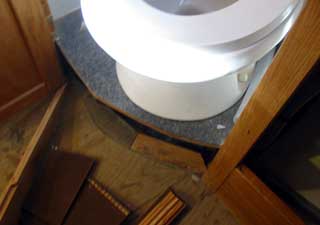
Pretty cool toilet hey? It's a Jabsco with all the cool electric pumps, macerator etc., all built in. I'd love to try it but...no water in this land of ice and snow. Sorry, I am trying very hard not to write a joke here! |
|
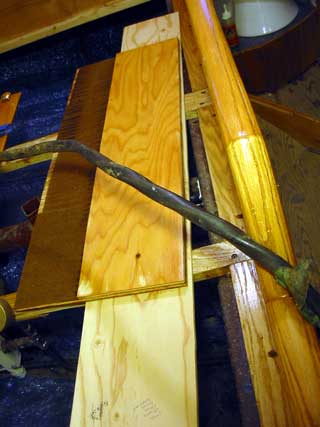
Because of all of the curves, the trim under the
toilet support required attention. The floor curving away was marked with a
level in segments, and a curve drawn dot to dot. Then I took a suitable
sized piece of wood and lofted the curve over.
With tambour, any slight defect really shows up, being separate little boards on material, so it had to be perfect! Anyway, there it is. Next I made the kick panel for the bath tub. Notice the supporting ply has been coated first. This is a "wet" area so an extra coat was applied after the tambour was attached with quick drying glue and small screws. |
 |
|
It sure looks better in there now! No more
ugly pipes. Gena needs to put in the valve for the bath tub drain. This is
so toilet water doesn't pump back up into the bath tub if used while healed
over to port.
It must be situated in the right corner under the tub, so she wants me to cut a hole in the panel for access to the valve. I really don't want this, so plan to use a power lock motor and worm gear to pull the valve open and shut. We'll see if that works! |
 |
|
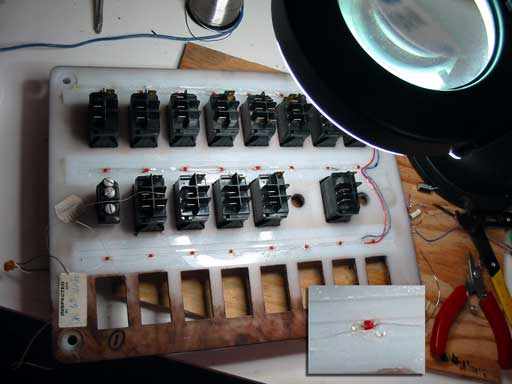
Gena was back at the dash wiring again. Last night she mentioned she was
going to start the switch panel, so I had to come up with a solution to
dimming the green HV E.L. lighting that illuminates the words over the
switches. This panel was bought off eBay, along with another, and seems to have been designed for a power boat so a lot of the switch names don't apply. I routed the "plastic wood" off to expose the white beneath it. We will add transparent labels for the new switch assignments. Anyway, the 2 problems with the
HV E.L. ( high voltage electro-luminescent ) back lighting is With all that, I tore it out, and replaced it with tiny 12 volt surface mount LEDs all strung together like Christmas lights. |
 |
|
The color, of course, was red. As can be seen in the dark photo below, they
work well! I glued them down with goop, then layed some tape over it.
The inset attempts to show one LED up close ( my camera isn't very good for up close stuff ) and the hair thin wire attaching them. |
 |
|
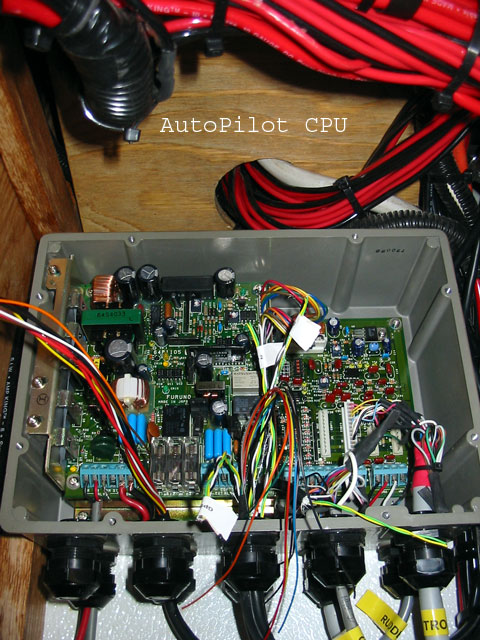
To the right is a picture of the
autopilot CPU box as it sits now. For more detail check
promain.htm under " wiring ". It
looks complex but really, apart from the seeming lack of ability on the part
of Furuno to design a "serial bus", it's not. Basically, compass, GPS, and rudder position data comes into the unit, and steering switching and display data come out. Because the box is nice and big, I requested Gena place the GPS NMEA junction in there. This is to feed my Dash Processor thingy , the PC RS-232 for charting, and the VHF for DSC position. (Yes we had to have one!) Another separate GPS output goes to the radar. My little amp board for the rudder sensor isn't in there yet. For more on that see dashrudder.htm. Because this unit only has 3 Amps output to control the steering, we must use relays or MOSFETs to drive the motor. Sounds simple hey? Not! |
 |
Day 434:
9 hours: More dash wiring, put in tambour kick boards in head.
| Replace
this button with a link to your site, mailme ..to Main page |