| Project 35 |  |
Building some cabinets |
Cabinetry |
Warning: This page is VERY big with many pictures as
it covers all of the cabinets.
| Preface: Once the interior is finished, split with bulkheads, and paneled, the "furniture" is next. Cabinets, which I will call them instead of "lockers" ( lockers are next to the gym to me..) are very different in a boat. We have some experience, Gena more than I, with making kitchen cabinets. Not at all useful in a boat! My theory on making boat cabinets is to make a solid framework first, then drape ply over exposed sides, and finally, add a face to it. The face should be solid wood so it can be rounded on the edges some. Sharp veneered plywood ends works in a kitchen, but not in a galley, or anywhere in a boat for that matter. Because I personally am prone to bumping into things, we want everything as injury proof as aesthetically possible. Gena started with the ones in the aft, and encouraged me to start the ones forward. Here's some clippings from the main site. |
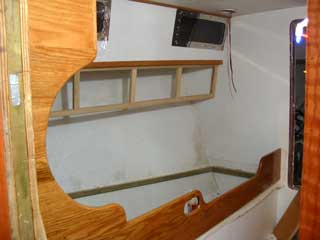
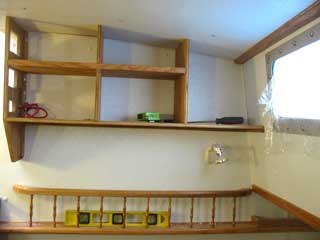
| Aft Berth Cabinets Gena (photo right) set to work on the aft cupboard face. She divided it into 4 doors as envisioned in the animation below. The boards separating each door were daydoo'd underneath to give the top and bottom a constant run. The inside can be seen in the photo below left. That kind of work always impresses me! The sunken in edge is cut out with a chisel. Gena has patience with that. I would use the router he he.
|
 |
|
|
||
|
|
In
this animation ( excuse the cartoonishness of it lol) the way the berth
flips up is shown. Even with this, I forgot that the door in the little
cupboard sticking out would be hit by the berth once up ha ha! So much for
CADing. The little
spindle rails I think are a cool touch to break up some of the large flat
areas that will be the cupboards. The small center cupboard may or may not
exist. We still haven't decided. The cupboard on the right in the latter clip will actually be accessed from the head. |
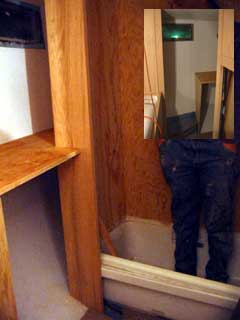
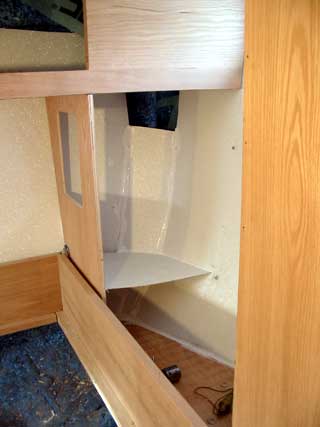
| Gena hummed and hawed about the base of the cupboards that will be on each side of the large berth. At first the idea was to sink it down low, but it curves in so much that not much space would be added. Also the depth may be a problem for reaching small objects thought to be missing that have rolled off into a deep dark corner down there! | ||
|
The easy and simple solution was to bring it up to the frame and build on top of it. ( yay! ) The (left) photo shows it in place. It had to be battened in for the curve. The accuracy is important as small objects may find their way through any cracks. Silicone will be added as creak proofing, as well as stiffening. | |
| Cabinetry is a tricky thing at best, even in a house, but Gena has her way of doing things with simplicity and weight in mind. | |||||
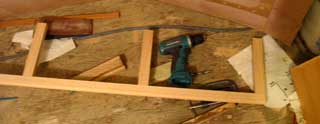
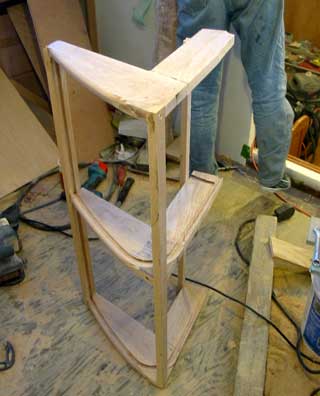
Because the face of these
little cupboards is going to be supported by the side, and visa-versa ,
no real framing is needed. Just Glue and nails ( and screws ) made it
really solid. The side not on in the picture to the right will also be
braced by a shelf and ( possibly ) a cupboard or another shelf. This
well keep it together. All of the joints must be glued to avoid weight
shifting, especially in heavy seas, causing the classic creaking sound.
It's a cool sound in a wood hull, but not in a cupboard right next to
your ear while trying to sleep!
|
 Little shelf wood supported on wood
|
||||
| As usual we try to work in different
areas of the boat so as not to get in each others way. Because I'm the
router expert, I felt obligated to do all of the rounding and slotting
for Gena.
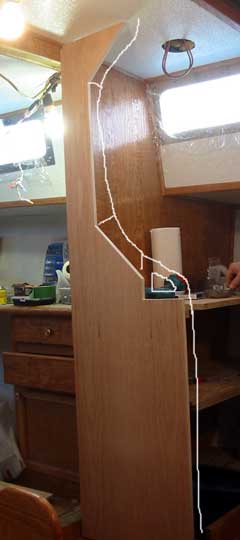
The photo to the right shows a nice edge in the entryway to the head. The whole 3/4" frame has been sunk in to fit over the cockpit support frame and to overlap the panel and plywood.
|
 View from head |

|
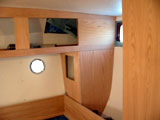
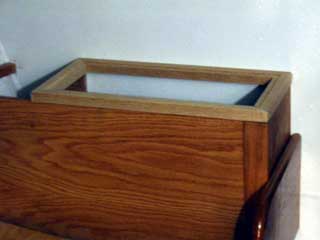
Inside of the framework is a piece of 1/4"
oak plywood. Each frame was slotted to accommodate this. We may put a
mirror in partially, or fully, to brighten the aft up and give the
appearance of a more open and large area. This works well in our house! Mirrors are ok as long as they are glued solidly on the back to plywood. If it ever broke it would be a bugger to remove, but at least the glass stays put! The finished frame looks really nice we think -and it's not even coated yet! The corner which is along the entry companionway has been rounded as well. I bumped into it and a 3/4" round is easy on the body.
|
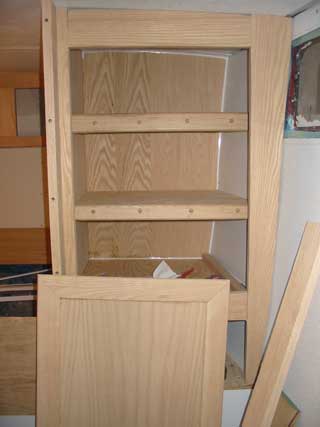 |
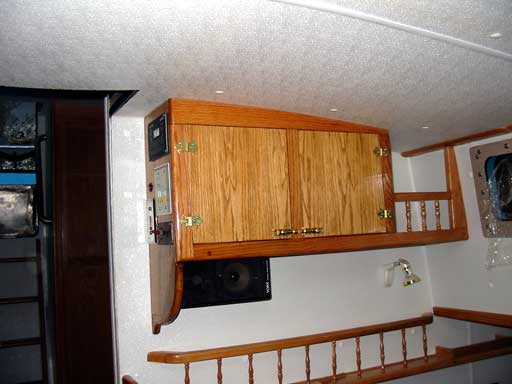
The Head The space in the aft seems to be dwindling away. If Gena would just stop building all of these cabinets and things, there'd be more room! But they are nice looking cabinets hey?
This cabinet will likely be holding towels and face cloths, bathroom stuff. Notice the lip Gena put on the face of the shelves. That's to stop everything from sliding off and doing a "jack in the box" surprise feature when someone unsuspectingly opens the door. The screws are hidden with risen oak plugs. Adds a nice touch we think. The attachments to the hell panel and ceiling have been siliconed to stop movement and hidden mildew etc.
|
|
|
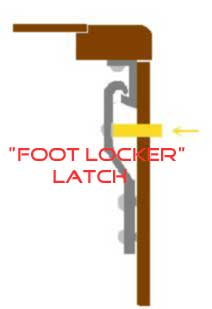
I have designed a simple
latch that may work. ( below) It is a rod that slides in a hole with a spring on
the end. The rod is drilled and tapped to accept a screw with the head
chopped off and the handle is screwed on to that. Pretty simple really.
Oak is strong enough that this would work. So if all else fails, these
will be it. I do love those fancy brass knobs!
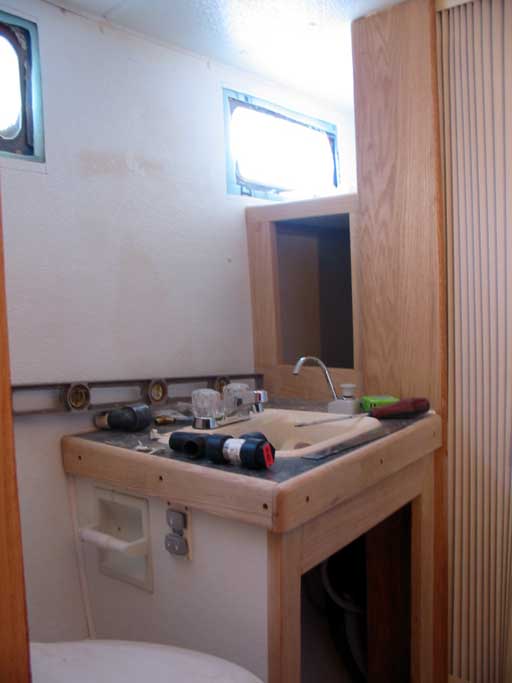
Gena was asking my opinion on where the vanity in the head aft should be. I think the face should be even with the hull as there will be a mirror there and it will look "even". The height we decided is 3" higher than usual so small children would need to climb up on the toilet mount to use the sink. That's ok! It always seems to me , especially when washing my face, that those vanities are way too low. In the photo to the left, a vertical plank encompasses the tub. The folding door for the enclosure will tuck in behind this nicely when not in use. Some of the angles involved in this area were a challenge for Gena, but she did a fine job of making everything fit! |
 The view of vanity, counter edge has been left to me |
 Gena kept busy finishing of the face of the vanity (Top page photo) and planning where all the pipes will go. I'm glad she has some knowledge about pipes from several house building experiences, as I'm useless at it. I haven't a clue about all those threads and sizes and fittings! |
The vanity is really starting to look
like...well..a vanity!
Gena asked for some border with nice rounded edges and the router and I
obliged.
Berth Ends
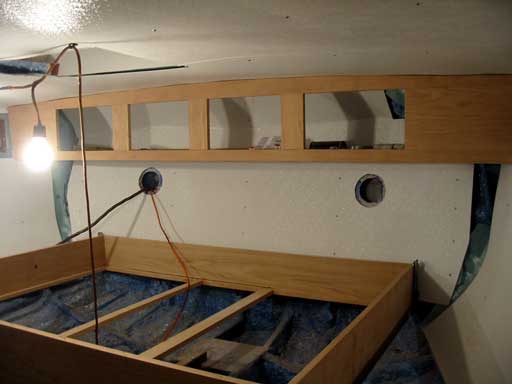
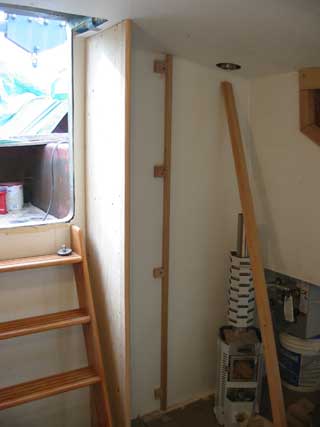
| The space in between the two
cupboards aft under the port-lights needs to be filled, and really I
have been planning it all along. In fact, although small, I have been
looking forward to doing something neat in there! I knew I wanted to have a small cupboard and perhaps put one of those little spindle rails along the top, but the door was an issue. At first I thought of using some of the roll top desk stuff ( tambours ) but that should be all reserved for the galley. Then for a while I had decided on 2 small doors but too tacky and would be hard to match patterns without using solid board making them too heavy. |
|||||
|
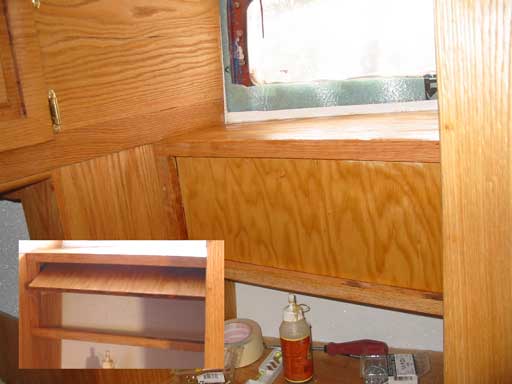
| The space in between the two cupboards aft on the opposite side could have also been a flip up cupboard bur Gena asked for a small bookshelf. This is a good choice as one often reads in bed. | |||
|
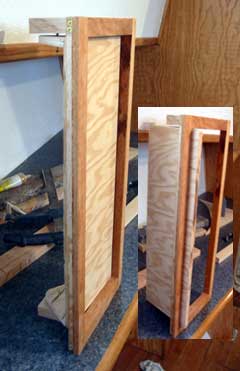
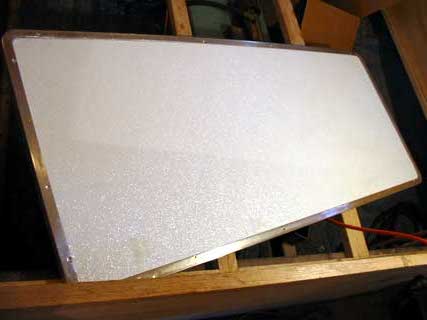
| Insetting the white panel over ply before
inserting it is a good way to do the door but the PL300 sealant that
squirted out was hard to get off of the the white! This is the exposed
side while the door is open. The side that will take all of the rubs in
a narrow gangway. It has some weight to it so it will need to be sturdily pinned open. The photo shows it sitting on the aft berth. |
 |
||
 Dry locker, cool design...or hot! |
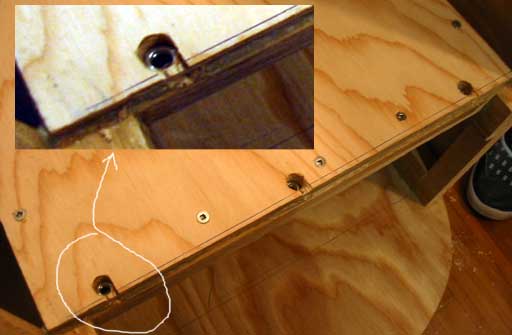
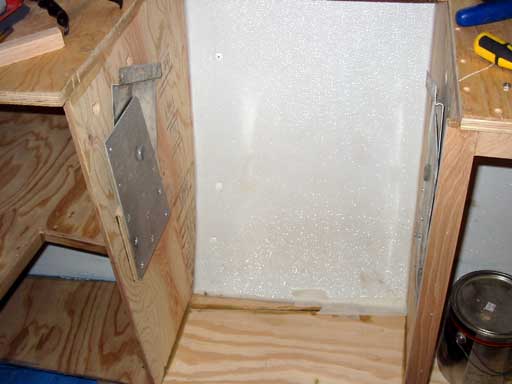
Dry Locker Scotty, a friend of ours who is in the process of rebuilding a similar boat to ours, asked if we were going to have a dry locker. We didn't even know what that was at the time, but now it's a necessity! A dry locker is somewhere to place your wet oilies ( or clothes ) when re-entering the boat during heavy/rainy weather. Normally, there is a heat source nearby, or a chimney stack going through it from a heater. This allows the clothes to dry out rather than sitting around in the boat getting everything else wet, hence, a dry locker. Because our heater is diesel, the flue needs to be almost vertical. It can be seen in the photo in rough position. Our option is to put the dry locker right next to the heater with a vent at the bottom and top to allow for circulation. If it is found a small fan is required then so be it. |
||
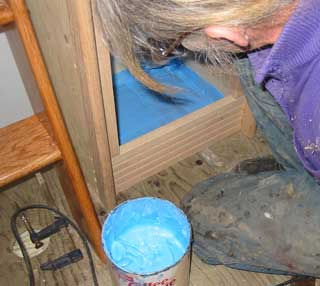
 The photo to the right shows Gena coating the bottom with blue stuff. This is a place for water to drip off of wet garments into. A drain may be added as the sump is directly below here. Even though screws were "toed" into the corners, clamps hold the frames while glue dries. Ready for finishing! |
|
 |
We acquired some thin stainless
plate is fairy good condition a while back so might as well make some use of
it. Aluminum would have worked the same way but I've seen what happens to
aluminum once the salt air gets at it, especially if it's not cleaned
regularly. It can't be polished without removing the anodized coating which
ends up making an ugly mess.
|
 |
Under Seat Lockers The seating in the dining area is also a locker, and offers a large storage area. I can see these being used to stow foodstuffs such as containers of flour, sugar etc. Also it might be a good place to store a small toolkit, so we won't need to go under the pilothouse floor into the engine area every time we need a screwdriver. For more on the seating, go here, or straight to Day353. Under the berths are an even larger area to store bigger, bulkier things. |
Forward State room
 |
Putting
wood together in a boat interior continues to big a tricky affair, although
today everything went smoothly. What is to come may be another story. Most
of the forward berth area I am working on is either curved, angled, or
twisted. I think the trick is to try not to be too accurate with irrelevant areas such as behind lockers, or under things that won't be visible anyway. Wedging behind a frame that runs along the ever changing hull shape, for example, is a lot easier that trying to plane the twist into a straight length of wood that will become curved when screwed into place. Planing for us isn't possible at the moment as we are waiting for a new belt for our planer! Besides, the frame is only connected at the hull frames so one doesn't gain much by flattening the frame against the hull.
|
| In most cases, the
frame is to support plywood for a locker/cupboard bottom or desktop or
shelf, so that edge ( being smaller ) can come in at any angle as long as it
doesn't leave a gaping hole. As the photo above shows, a little more advance planning would have been an asset and would have prevented the complex join below the clamps. It's just hard when one isn't really sure how things are going to be until reaching a certain point of the project. |
|
 |
A good use of space is a must in
this area, and lockers under the deck will provide lots of
storage for bedding, extra pillows, clothes etc. We want the
whole berth to appear to be a single unit, ( cozy and
comfortable as mentioned before ) but leave a feeling of
spaciousness. The flow from the overhead locker to those along under the deck is accomplished by leading the frame down. Right away Gena was concerned about head bumping but I assured her it wouldn't be a problem. |
 |
The long smooth curve ( photo left
) cut most of that sharp point off. The strange shape was not
only to accent a bookshelf that will be to the left, but also to
avoid a rather nasty knot in the board! It won't really be
visible from anywhere but inside the locker next to it. You may notice that all of the wood is coated before it is finally put in. This is to coat areas that will be inaccessible after in place and won't have glue in those areas. After seeing what heavy moisture can do to exposed wood in a very short time (ugly black streaks) it seems to be a good move albeit things are constantly delayed waiting for pieces to dry. |
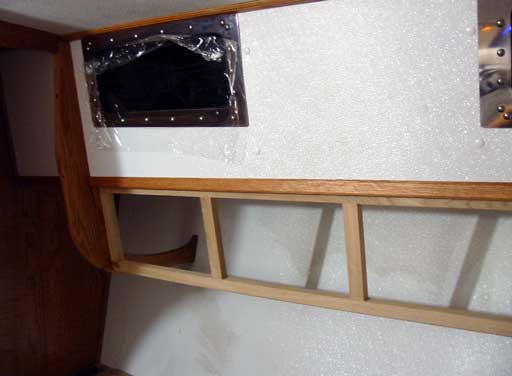 |
The lockers under the
forward portside deck continue to be my job, and require some precision
to look good. A slot routed in behind will hold the plywood bottom and
allow for a bit of error in the cut. A frame still needs to be added along the hull, and small frames across where the sections will be divided up. Below these is a large expanse of white panel that I don't really like, but I'm not sure if this can be remedied. More cupboards would take away space from the berth. |
|||
|
||||

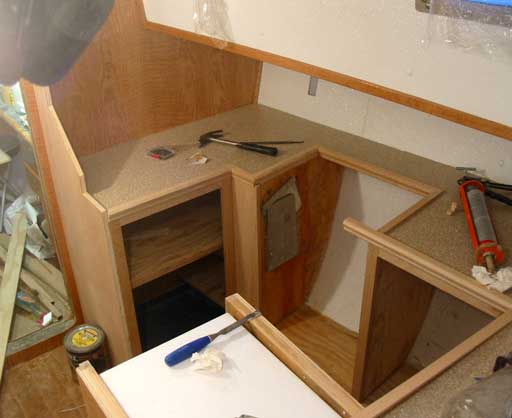
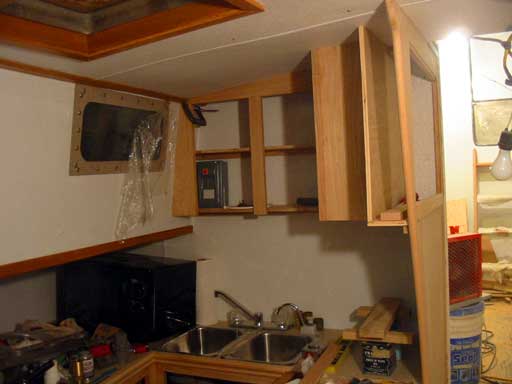
Galley Cupboards
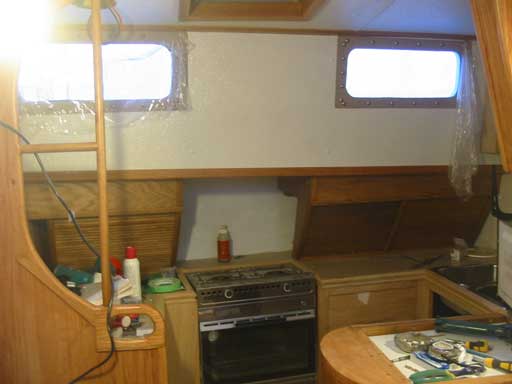
| Today the galley got underway.
Gena was head carpenter in the kitchen when we were building the house,
so it only seemed appropriate she be the designer of our kitchen. I use
the word designer in a " how to do what
Sandy wants" context! The photo above shows how quickly the new 3/4" countertops became a tool storage area lol! The pointy scraps are just holding them up, not a finished product. |
 |

| Gena
has made very good progress in the galley, with the stove/oven area
fitted and shelving planned. The counter seems to be out far enough to
be usable without pushing ones head into the cabin side. It could stick
out more but hey, we could have a larger boat! The vertical dividers were battened in to the hull and cut, then screwed and glued in place. It's a good idea to glue everything (we use PL400) so that wood can't creak from weight shift, which is very annoying. -Unless you like that creaking sound. Some of the hard to reach areas must be
used as everyone who is out there cruising already seems to mention lack
of space for foodstuffs and/or cooking related items. Gena split the
deep aft edge with a shelf to perhaps facilitate our actually using
these areas on a regular basis.
|
|||||
 |
Gena got off to a good start
today by perfecting the island in the galley. Notice the lid is off the
freezer, ready for some new hinges once the lid has been outfitted with a
breadboard. ( I'm talking about the type for chopping, not for mounting
electronic components ha ha!) We have allowed for minimum hip space of 22" between counter tops. This is a nice distance ( unless one is overly "large") that will allow bracing as well as movement, bending over etc.
|
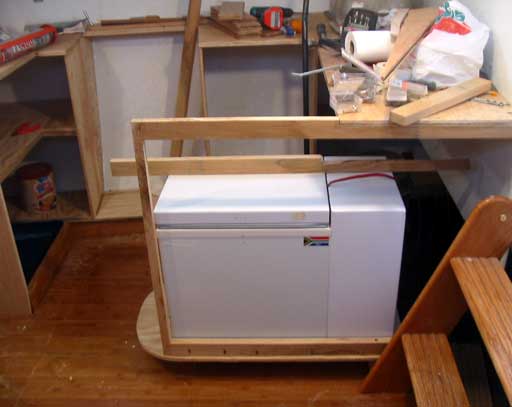
| She has done well to keep the countertop level and even as it wraps around the galley. The freezer must come up and be leveled precisely to allow the seal to close on the freezer, yet be a t counter height. |
 |
 |
This has been accomplished by
making some leveling nuts that are countersunk into the base for the
freezer. The inset shows the nut. These nuts will be threaded with bolts and locking nuts that will allow the level to be raised and lowered easily from each end. Because the freezer is on a risen platform, some space under it has been salvaged. A long drawer or cupboard will be made. |
 Gimbals in place, bolted in well! 7 on each side. |
Pictured here is the gimbaled
assembly for the stove attached. The original configuration was a wrap around that hung
from higher up. This was all fine until we realized the oven would need to
be 2 feet away from the hull; putting it out in the middle of the galley.
The swing distance was much too large!
The gimbal point is lower but it still will balance and we are prepared to put in some small chunks of lead underneath if it becomes a problem. Notice the cabinet face protruding inward. It will come close to the oven but won't touch. |
 |
Gena chose some trim that
has a 3/4" inset and a relatively round edge. The height above the counter
is about 1/4". A lip will help keep things on the counter while under way or
at a rocky anchorage.
Myself, I don't much like a lip as it is a little harder to keep clean. Stuff tends to pile up in corners, and this will be an area to keep sanitary. Many galleys are this way so I suppose it isn't a problem. The counter top pattern is great as it doesn't require any particular orientation. The color is similar to wood colors, but not too dark. While lining up the counter top with the Formica, both covered in contact cement, one corner accidentally touched as we were positioning it! Gena pried and I lifted. Slowly it came back off. Almost messed up the whole thing! Almost.
|
| As we have bought a brand new
19" LCD TV for the boat, we need somewhere to put it. It was never an
option as we like to watch sailing videos, our own videos as well as
test my music videos, local TV broadcasts and even watch movies. There are several options including either bulkhead over the dining area, but this would cause cricks in the neck after any amount of time looking up. My desire was always to put it on the back of the cupboards that were then to be coming out over the countertop island in the galley. After looking at this and making a mock version of those cupboards we realized the cupboards would be too big and make the galley cumbersome. |
|
| The solution is to shorten the cupboards
to 18" but extend the "TV box" the full 36" alone. The idea seemed to
work but the whole thing needs to be styled in accordance to the rest of
this area, plus have no sharp edges.
Another issue is where to put the 12 volt microwave? Everywhere except
under the decks seemed just a bit too small. We searched shops for
another, even if it meant powering off the inverter, but it seems they
are all about the same size. Under the decks I want to put roll top
cupboards so those areas are out. |
 |
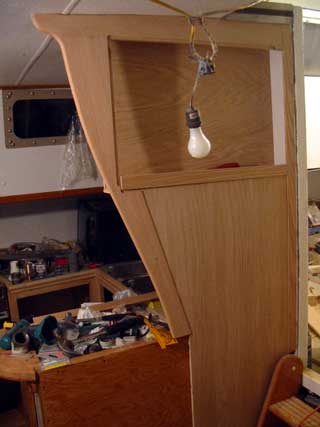
| So I got to work making it become reality.
As can be seen in the photo (right) the top will get it's support from
the ceiling. A solid board of oak will do nicely. Originally, the
plywood from the counter was to continue to the ceiling but with this
new design, it only goes to the bottom of the cupboards and will serve
as a base for the TV box. After fitting all of the wood precisely, a curved end must be decided. I have used photoshop and an offset image ( slightly to the left ) to create a visual perception of how it may look. It seems ok so that's how it will be! (photo below ) The edges
around the face of the box must be routed in about 1/8" to inset a piece
of Lexan.
The little drawn-in panel near the top left is a projection of my stereo amp/control. (yes! Another electronic project!) Here we will be able to select inputs from the TV/DVD/radio/audio input jack. |
 Support top board to batten in ceiling curve  |
| After the big push to get the TV stand up, Gena can finally do some wiring from the shore power socket to a breaker panel, then to the charger unit under a galley seat. |
| Under Deck Galley Cupboards | |
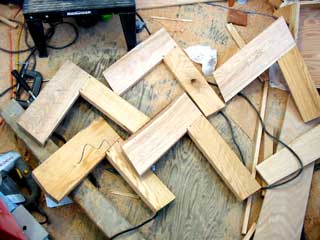
| That said, I have come to the
small cupboards underneath the deck along the galley countertop. I have been
looking forward to these as they will be "roll-up" using some of the tambour
we acquired on eBay a while back. First the frames need to be cut and
joined. The whole side could be one solid chunk of oak but there are always
weight considerations, particularly this high above the water line. The frames need to be fairly wide though as to accommodate the slider track in a curvy fashion, and to have some structural strength. |
 |
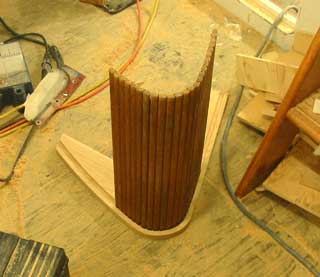
| Once the glue set, the outside
shape was cut to use as a guide for routing the tracks. The round top edge
cut away will be re-attached after the cut to butt the top facing into.
Seemed like the easiest way to do it. This was done early so the glue
dried to allow working of the sections. ( photo right ) Notice the top board overlaps the rounded board, being routed in, glued and nailed makes for a good strong join. ( I wish I could "dove tail"; haven't quite got to that level of expertise yet! ) |
 |
| Because the deck increases in
height as one moves forward, I decided to pre-construct the frames and
insert afterwards as a whole unit. The uneven height along the top will be
solved with a face board cut to fit. Some style of handles must be purchased
that won't stick out too much and will blend well into the scheme. |
 |
| ...testing testing 1, 2, 3.... |
| A oui! Quel beau tambour! Once the frame was together I was surprised to see how well they slide up and down. This stuff is great! As it was purchased "used" I can only guess at how old this stuff is or where it came from. |
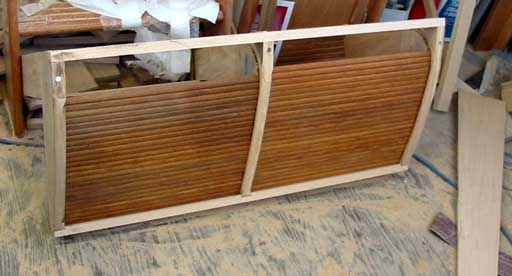
| For the tambour, a 1/4" x 1/2"
slot was cut and the frames spaced apart to allow 1/8" movement. This way
moisture expansion shouldn't be a problem. If there is a problem, the ends
of the tracks have been routed downward to facilitate removal of the
tambour. So far so good! The real trick will be fitting them in place. There will be another one of these only single to fit on the forward side of the stove (pieces 4 & 5) but I can't get any real measurements as Gena is working in that area. ( God forbid I upset her concentration with the wiring. She's been under there a while, better go check and see if she's ok he he. Below is the cupboards in place, with framed faces on. ( 1/4" ply with routed in frames.) Shelves and dividers still need to be mounted inside them. |
 |
|
Dining Area
Cabinet |
The experience from past cabinet
building ( over the last few weeks ) has told me that maybe making the
shelving and frame as much as possible before putting it in would be a good
idea.
|
||
A bookcase offsets the cabinet nicely, as does the facing edge under the panel. Good place for a speaker! |
|||
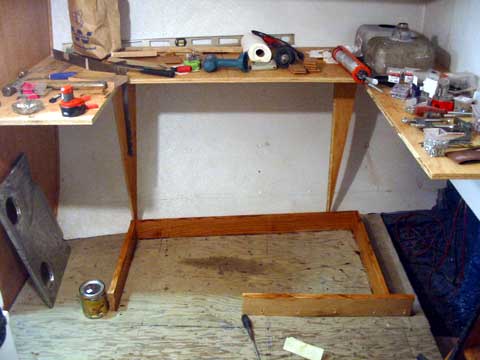
Foot Locker
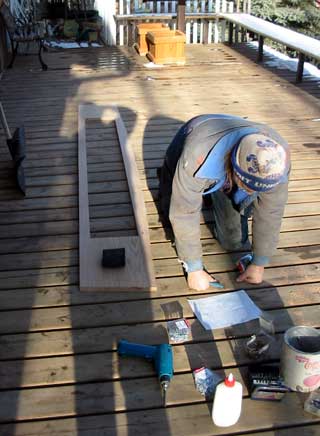
| The perfect time to work on the
foot locker in the forward berth. The framed top will flip up and house our
monster sewing machine. The small frame on the end will be attached for the
larger frame to hinge from. The reason this was done this way was because
the sewing machine just barely fits, even the lid swinging up would be in
the way! The little end section won't be attached until a cubby hole is cut out in there to stuff sewing accessories.
|
 |
||
|
 |

Nav table? Area? coming
![]()
to Individual projects main page