| Day 427 |
 |
Tub Enclosure/ window
trim |
| Day 427 |
|
Tub Enclosure/ window
trim |
| As the WX ( weather for you
non-hams! ) gets much colder, we must focus our efforts on some inside
only work. The tub enclosure cracking thanks to last years extremely
cold temps, needs to be fixed. We came up with several different
solutions including tile, melamine, and even barker board. Each one had
it's drawbacks in this situation. Problem is, the original enclosure was to be attached with a "newer, better" contact cement. ( Better according to the sales guy at the hardware store we were at...) Of course it was either garbage or was way past its shelf life. Gena was swearing and cursing with it, and believe me it takes a real problem before she starts doing that. I came into the aft and I guess the stuff was going on lumpy, then didn't stick the enclosure to the plywood at all. She became like me ( a hothead ) and said "screw it! I'm using PL-200 glue. PL-200 is good stuff, but comes out like 10 year old calking. Not very compressible. It's more designed for plywood to board adhesion, hard stuff. She pushed it on anyway. It seemed to be ok. After the summer ended, fall passed, and winter came, I went into the head to do some coating and noticed the gaping cracks! We were devastated enough that no thought was too short on the topic for almost a year.
|
|
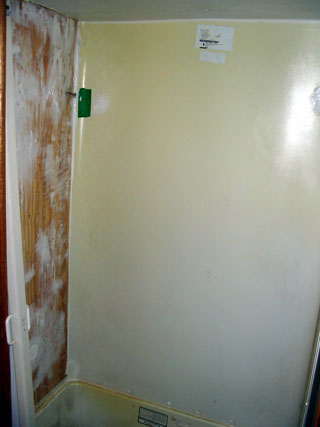
| The old broken and torn-away enclosure
section needed to be removed, but left some uglies in the form of lifted
areas and "RV sized" holes, rather large in comparison to regular tap
mounts. Melamine would need some serious filling to match the now uneven shape, as it needs 100% support. Tiles were out of the question. Barker board looks nice, is strong and works well in home installations being totally waterproof on one side, while the other is exposed only to dry "land" air. That is the problem. Any kind of press-board swells like it's going to have a litter of little press-board kiddies. Oh well. That was when it hit us. Vinyl flooring! It's flexible, tough, waterproof, comes in tile-ish looking designs, and is cheap. |
|
| We zipped into Edmonton and
bought some at the local Rona, the thick stuff mind you, and brought it
home. Gena immediately set to work, ripping, cutting and tearing out
anything that looked offensive, (photo above) and filled the damaged
areas with silicone. To anyone removing PL-200 from plywood out
there....good luck! Thankfully, the tub which is made from a heavier material, survived the ordeal.
|
|
| As I couldn't bear to watch the destructive forces at work, I wandered around noticing the gathering habits of frost in the boat. As I said, it has become extremely cold outside, about -30ºCelcius-ish, and our electric heater has been happily running up our electricity bill quite nicely these days. |
|
|
 |
|
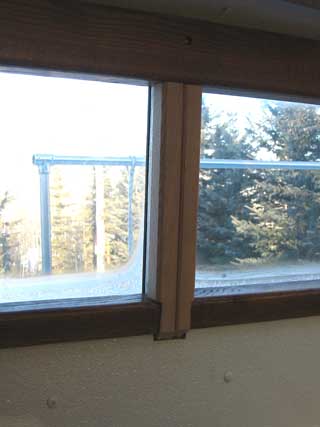
Anyway, I occupied my time with covering the vertical supports around the windows in the pilothouse. This was planned right after I saw how ugly the paint was! Two 1.5" oak corners together would cover them nicely, and save me some work. Some fancy cutting was executed, but became easier after the first 4. |
|
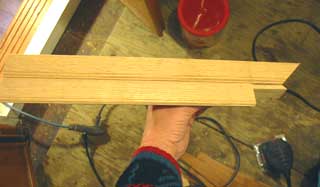 |
The photo left shows how. The top
piece was cut to a 45º angle with the miter saw, to match the shape of the
support, then the side was cut out to match the bottom window frame, which
all varied slightly in height and shape. Practicing visually lofting wood pays off after a few hundred times or so ha ha! |
 |
|
| Keeping the jigsaw
oriented the same way for the cut was challenging though.
Because all of these pieces will be next to a window, the dew point is an enemy. Therefore, they need to be coated, inside and out, several times, with oil the varathane. This means I can't put them up yet. Boohoo! |
|
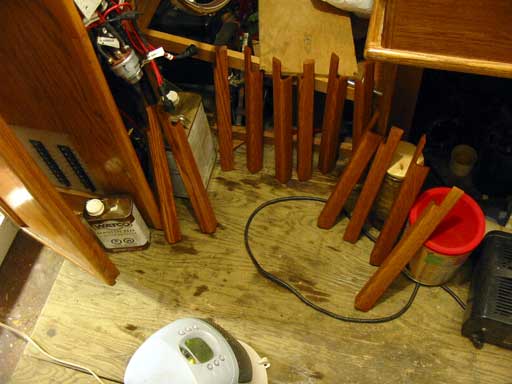 Heater dries second coat. Without heater in this cold it'd take a week! |
|
Day 427:
7 hours total: stripped 2 bathtub "walls" and re-sealed edges, leveled. Made
vertical support covers for side windows.
PS, check out
projects main for lots of new/updated entries!
(Jan2008)
| TO Replace
this button with a link to your site, mailme ..to Main page Sail1.htm |