| Day 453 |
 |
Valves!
slide-latches minor wiring |
| Guess why I am showing a new photo
of the water system pressure tank hub? Notice anything different? The diaphragm style solenoid valves are gone. Why? Because, upon putting some test water in the tanks, and trying it all out, the plastic pieces of sh** went up in smoke 10 seconds after the breaker was thrown. Smoke came billowing out from the engine room, and I asked Gena "were you burning something down there?". Thank you Rona or Home depot. Thank you whoever manufactures these for labeling with such explicit voltage ratings and other pertinent info for anyone that might be using these for anything other than your particular lawn sprinkler system, which is probably 6 volts. Guess we should have done more than tested them briefly with the water hose last summer. Off to the irrigation supply place again! The other valves, the ones in the picture, now 4, work properly, and don't heat up even after 10 seconds. Problem is they are expensive. If we'd have bought them to start, we wouldn't have bought all the other types we tried which probably ended up adding up to the same amount. The original system is on day 311 , if you want to see the valves that smoked. These ones hit the garbage so quickly, I didn't have a chance to photograph them! ***August 2008 Update: |
 |
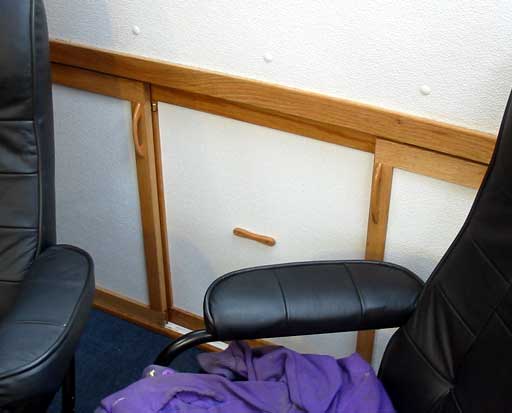
This I did photograph though. For
ages, ever since I made these sliding doors in the pilothouse, I have been
trying to figure out how to latch them. I wanted them to be easy to use, yet
hold the doors closed properly. There might be quite a bit of stuff back there, and the doors will take the abuse being aluminum backed, but that won't be any good if the latches aren't locked, or fail. I bought some sash locks thinking they could be mounted on the ends vertically, but that still left the center door to worry about. I became so frustrated that I planned to just use ugly hooks to hold them.
|
 |
Suddenly the idea to make one door
connect to the next came to mind. Both doors on either side latch to the
center door so either outer door can be opened independently, and if the
center door needs to be opened, just grab one latch and slide it either way
and slide the other door off it. Hmmm. Ok that sounds complicated! It really isn't at all. Maybe I should make a video...
|
| The handle rocks on
the grommet side, and a tapped/ threaded stub of brass rod is screwed onto
the other screw with it's head cut off. A spring keeps tension on it. The
hole was routed in to 5/8" depth or so. The striking plates are aluminum
edging for carpet to floor joins ( same stuff I used around the stove hood )
with the ends bent in. This is so the pin will ride up it when the door is
slammed shut. I tested it over and over a thousand ( well maybe a hundred!)
times and they work perfectly. And to think I didn't even feel like doing
any work on the boat when I got up this morning.
|
|
 |
Once Gena went to town,
came back from town with the valves, and installed them, she had perhaps 4
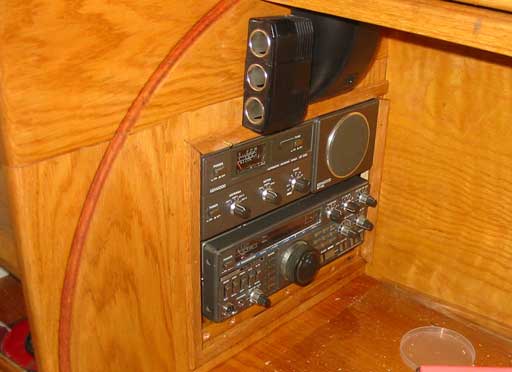
more hours to get finished what she had wanted to do today. One thing was the ham radio in her desk. She had stuffed it in the all-too-small hole I had cut out, and in trying to fit it all in, didn't use any brackets or Velcro. There was no room. Then the antenna tuner ended up pushed in, and everything jammed. I wasn't watching, but I heard lots as
she fought with it. When I made the sliding shelf for the radio, it was for
just that. The radio. I didn't know she was going to add all the other
stuff. So I cut the hole bigger and the desk started to become "hole".
I'm a little touchy about it because I heard my name muttered a few times as
well. I won't continue down that avenue... It all came out for the better in the end. |
 Makeup light switches & valve control in head |
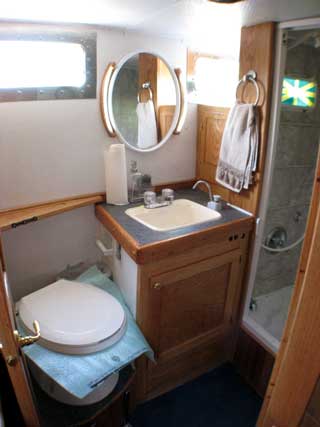
Even after my thoughtless design
screwup with Gena's desk, she was kind enough to mount the switches for the
makeup mirror lights I have just mounted. Also, the electric bath tub valve
was installed. Last night I built a valve controller for an electric door lock motor to open and close the bath tub drain. Gena wanted a door cut out of the tambour fascia along the bath tub so the valve could be manually opened and closed. I didn't. |
 |
|
| The controller
had to be a programmed microcontroller or one would need to stand holding
the button while the tub drains. It works great! I did the whole thing in
one night honest! There is/will be a link to that on
promain.htm project page if you want to read the technical stuff,
download the software, or start a manufacturing company with me. Ha ha. The little picture above right is the make up lights almost in place. I want to test them for a while before I glue the pipes down solid. There's a better picture below. |
|||
 |
This picture was taken
during the day, but at night they are extremely bright. All of those tiny
SMT LEDs together work well. Now I'm wondering if a light really needed to
be added into the ceiling.
For all intent and purposes, we can say the head is complete! |
||
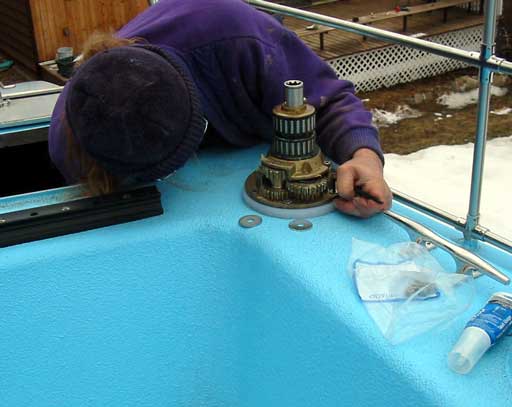
| After the wiring, Gena went out
and got some fresh air mounting the smaller winches for the main sheet.
We're not totally sure if the winches are angled properly, but a nylon shim
was made to get them up to where we "think" they should be. To be honest, our experience with winches is very limited. You wouldn't know it the way Gena seems to have that winches dissection in hand hehe! |
 |
| I continued my afternoon with
(finally!) getting the tangle of wiring behind my radio / studio panel
started. Here's the before picture ... |
 |
| ...and now the after picture!
Aaaaaah!! I have no real schematic of this complicated tangle yet, just a drawing on a napkin I did last winter sometime. Once there is a formal drawing, I'll post it here. Scary thing is, it's still not finished yet. More must be crammed in there. In "other projects" on promain.htm there are parts of this. Here's a basic run down of every thing. The way it is and the way it will be: The antenna switchbox switches the
mast top custom VHF antenna to either/and/or the VHF 2M ham radio, the
WEFAXsat unit, the scanner, and the TV. The rest isn't interconnected. The inverter, the switches for lights, audio amps, and PC case fan are all next on the hookup list. The side panel has some stuff on it as well, but I'll leave that for another day! |
 |
Day 453:
10 hours++ ; made valve controller for tub, mounted switches, wired my desk,
wired and installed Genas radio stuff, fixed water pressure system, made cool
sliding door latches.
| Replace
this button with a link to your site, mailme ..to Main page |