| Day 363 |
 |
Drains seat hatches |
| Day 363 |
|
Drains seat hatches |
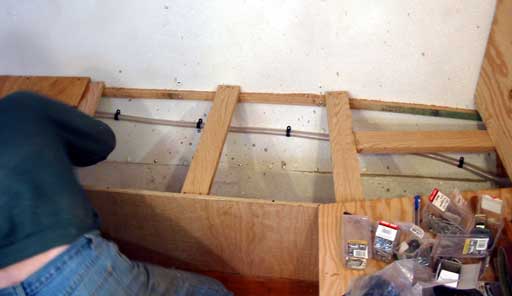
| The drain system in the galley has been
designed as thus ( photo above ) and I don't think I had much to say
about it! It allows some room to access the water maker under there for
sure. If we are healed over on the starboard side, water will remain
trapped for that time in the outer drain, but won't reach a level to
come back into the sink -unless we're broached God forbid! Notice the "T" fitting on the cold water line. This is for fresh water flush on the water maker. If the watermaker isn't going to be used for a time, this will evacuate all of the saltwater kooties in there as they can't live in fresh water. We'll probably do this every time as it extends the lifespan of the membrane filter It seems to be a complicated series of actions at this time but I'm sure we'll grow accustomed to it fairly quickly. During a flush, the saltwater intake valve must be closed or else the fresh water would just pour out into the sea, being under pressure and all. If it weren't for money issues, I would have all of the valves electric ( the kind that don't need pressure as mentioned on day 311 ) and control it from a computer screen or via a remote like in a James Bond movie. "Control water system loopback pressurizing in 5,4,3,2..." goes the monotonic computer voice... Maybe on our next boat ha ha!
|
||
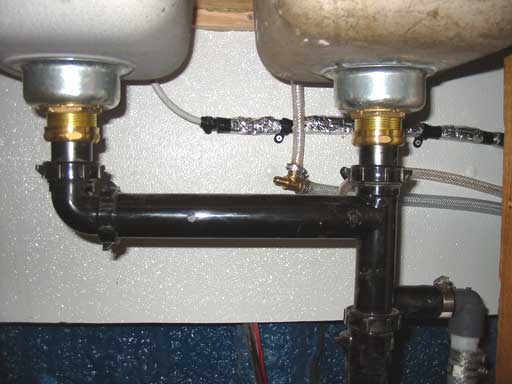
| One nice thing
about using hoses -they can run just about anywhere and make corners
without fittings. This line Gena is installing ( photo below ) is fresh
water to the pressure pump that will be installed in the bow. The
pressure pump is one of those standard 120 volt things used to wash a
car, or clean off a deck, sidewalks etc. I'm not sure what the psi
rating on it is, but it does kick out a fine stream of highly
pressurized water that will blast most dirt and "muck" of off a chain as
the anchor is being brought up.
We think it is a good idea even though the inverter will need to be powered up for the 120 VAC. Next she ran a salt water line up. We're certain we want salt water up there as well, good for more lengthy cleaning jobs that can be rinsed with fresh water afterwards, but not sure if it's a good idea to run salt through the pressure pump. We'll need to tear it apart and see if the pump is rubber diaphragm or metal cylinder type.
|
   |
||||
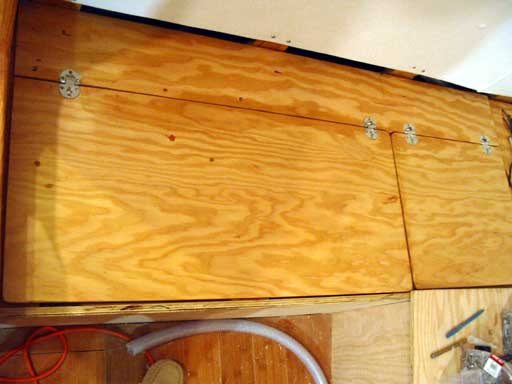 |
| A cool
hinge I found by chance at Windsor Plywood , part of a custom order by
another customer, became the hinge of choice for the seats. They need a
bit of prep for seating: a 1 1/4" hole drilled 1/2" from the edge, then
a 1/16" lip support routed in around that, and special sized screws to
boot. They were worth it in the end as they are flush and lift the ply
as being opened so as to allow a close fit. Also there will be no wear
on the seat cushions from these. They are nickel plated brass, no rust, good for a boat. A latch system for the seats is still up for debate as is how many holes to drill in this ply for ventilation....it's hard to find info on this. |
Day 363:
6 hours - ran pipe to bow, installed drain pipe for sink, made first section of
seat hatches in dining area
To DAY 362 |
Rent
marine advertising here...free tryout Email for more info! |
To DAY 364+ |